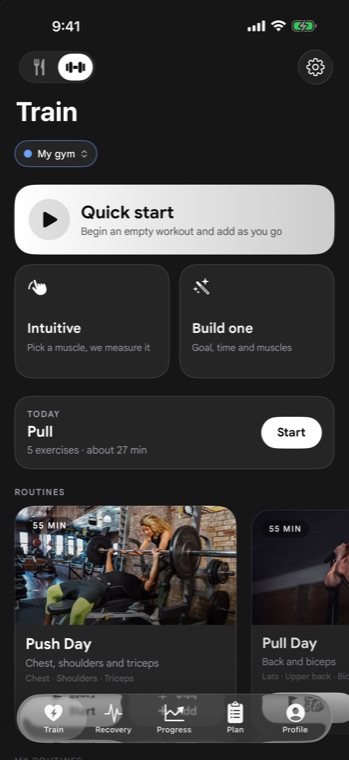
In the pursuit of muscular hypertrophy and maximal strength, the question of training intensity remains central: how close to absolute muscular failure should each working set be taken? For generations, old-school bodybuilding lore preached that “a set only begins when the pain starts,” mandating that every set be taken to complete concentric failure or beyond with forced reps and drop-sets. However, contemporary exercise physiology reveals that absolute failure is an extraordinarily blunt, fatigue-inducing instrument. While training close to failure is necessary to recruit high-threshold motor units, consistently grinding to absolute failure generates disproportionate central nervous system (CNS) fatigue, prolongs recovery times, and compromises total weekly volume load. This is why the Reps in Reserve (RIR) framework has become the gold standard of evidence-based strength training.
In this comprehensive scientific guide, we dissect the neuromuscular physiology of RIR, explore Henneman’s size principle and motor unit recruitment, examine the fatigue-to-stimulus ratio, and provide an actionable protocol to integrate RIR into your training via an intelligent workout tracker and companion smartwatch sensors.
1. The Neuromuscular Biology of Muscle Fiber Recruitment
To understand why proximity to failure matters, one must examine how the central nervous system controls skeletal muscle contraction. Skeletal muscle fibers are organized into motor units, each consisting of a motor neuron and all the muscle fibers it innervates. According to Henneman’s Size Principle, motor units are recruited in an orderly hierarchy from smallest to largest based on the magnitude of force required:
- Low-Threshold Motor Units (Type I Fibers): Recruited first for low-force tasks. These slow-twitch fibers are highly fatigue-resistant and oxidative, but possess minimal capacity for muscular hypertrophy.
- High-Threshold Motor Units (Type IIa and IIx Fibers): Recruited only when high force output is required or when low-threshold fibers become fatigued. These fast-twitch fibers possess the greatest capacity for tension generation and myofibrillar hypertrophy.
When you lift a heavy load (e.g., 85% of 1RM), the nervous system recruits high-threshold motor units immediately from repetition one due to the immense external force demand. However, when lifting moderate loads (e.g., 65% to 75% of 1RM in an 8 to 12 repetition bracket), the nervous system initially relies on low-threshold units. Only as those fibers fatigue during the set does the brain expand recruitment to high-threshold motor units.
This is where RIR becomes paramount. If you terminate a set with 5 or 6 Reps in Reserve (5-6 RIR), the high-threshold motor units were never recruited long enough under high mechanical tension to stimulate the intracellular signaling cascade (mTORC1) required for muscle growth. Only the final repetitions of a hard set – typically those performed within 0 to 3 RIR – provide the high mechanical tension necessary for optimal hypertrophy.
2. Defining Reps in Reserve (RIR) vs. Rate of Perceived Exertion (RPE)
While RPE and RIR are closely related, RIR provides a more concrete, objective cognitive anchor for lifters. RPE reflects a broader sense of “how hard the set felt,” which can be easily confounded by cardiovascular panting, localized lactic acid burning, or psychological fatigue. RIR strips away subjective emotion and asks a single mechanical question:
RIR = The number of additional clean repetitions you could have completed with identical technique before concentric failure occurred.
The correlation between RIR and Mike Tuchscherer’s 10-point RPE scale is direct and symmetrical:
| RIR Score | RPE Score | Mechanical Description | Neuromuscular Stimulus Level | Fatigue Accumulation |
|---|---|---|---|---|
| 0 RIR | RPE 10 | Absolute concentric failure; zero additional reps possible | Maximal fiber recruitment | Extreme central & peripheral fatigue |
| 1 RIR | RPE 9 | Extremely hard; exactly 1 clean repetition left in reserve | Optimal hypertrophic stimulus | Moderate, manageable fatigue |
| 2 RIR | RPE 8 | Hard; exactly 2 clean repetitions left in reserve | Optimal hypertrophic stimulus | Low, highly sustainable fatigue |
| 3 RIR | RPE 7 | Challenging; bar speed slowing; 3 clean reps left | Effective hypertrophic stimulus | Minimal systemic fatigue |
| 4+ RIR | RPE ≤ 6 | Warm-up or non-stimulating; minimal mechanical tension | Sub-hypertrophic stimulus | Negligible fatigue |
3. The Stimulus-to-Fatigue Ratio (SFR): Why 1-2 RIR Beats 0 RIR
The most important concept in modern hypertrophy science is the Stimulus-to-Fatigue Ratio (SFR). Every working set produces both a positive hypertrophic stimulus and an unwanted fatigue penalty. Your goal as an intelligent athlete is to maximize stimulus while minimizing fatigue, allowing you to accumulate high-quality volume across the training week.
Numerous randomized controlled trials (notably by Dr. Brad Schoenfeld, Dr. James Fisher, and colleagues) demonstrate that stopping a set at 1 to 2 RIR stimulates virtually identical muscle hypertrophy compared to grinding to absolute failure (0 RIR). However, the set taken to 0 RIR generates up to three times more central nervous system fatigue, doubles muscle damage markers (creatine kinase), and prolongs neuromuscular recovery by 24 to 48 hours.
If you take your first set of squats to absolute failure (0 RIR), your performance on sets 2, 3, and 4 will plummet drastically (e.g., 10 reps, then 6 reps, then 4 reps). If you instead terminate set 1 at 2 RIR, you can maintain high repetition output across all sets (e.g., 10, 10, 9, 9 reps), achieving significantly higher total volume load and time under tension in your workout tracker.
4. Objective Velocity Telemetry: Eliminating RIR Guesswork
The primary critique of RIR is its subjective nature: how do you know with certainty that you have two reps left? Research shows that inexperienced lifters frequently underestimate their capacity, believing they are at 1 RIR when they actually have 4 reps remaining.
This is where sensor-based intuitive training transforms subjective ratings into objective science. Using the tri-axial accelerometer inside an Apple Watch or Wear OS device, advanced algorithms track mean concentric velocity (m/s). Because velocity loss directly correlates with neuromuscular fatigue, the sensor alerts you when bar speed has degraded by 20% to 30% – the precise mechanical signature of 1 to 2 RIR. This removes all subjective guesswork from your lifting log.
5. Step-by-Step Protocol: Applying RIR Across Exercise Classes
Different exercises carry vastly different systemic fatigue and injury profiles. Apply this 4-phase framework to program RIR across your routine:
Phase 1: Compound Spinal-Loaded Movements (2 to 3 RIR)
Exercises that place heavy axial loads on the spine (such as barbell back squats, deadlifts, and standing overhead presses) carry high systemic fatigue and severe injury risk if technique breaks down. Always maintain a conservative buffer of 2 to 3 RIR on these movements. Never train axial compound lifts to absolute failure.
Phase 2: Stable Multi-Joint Machine and Dumbbell Lifts (1 to 2 RIR)
Movements that provide external stability (such as hack squats, leg presses, chest-supported rows, and dumbbell incline presses) isolate the target musculature without risking spinal injury upon failure. Program these movements with a tighter buffer of 1 to 2 RIR to maximize high-threshold motor unit recruitment.
Phase 3: Single-Joint Isolation Exercises (0 to 1 RIR)
Isolation exercises (such as dumbbell lateral raises, cable triceps pushdowns, and leg extensions) impose virtually zero central nervous system fatigue or axial loading. Taking these movements to 0 to 1 RIR (or even technical failure on the final set) safely maximizes metabolic stress and localized fiber stimulation without compromising your recovery.
Phase 4: Linking RIR with Daily Recovery Metrics
Monitor your daily recovery status using your sleep and recovery tracker. On days when your nocturnal Heart Rate Variability (HRV) is elevated and your Energy Bank is high, you can aggressively push your compound lifts toward 1 to 2 RIR. On low-readiness days, respect your biology and maintain a safe 3 RIR buffer.
5b. The Psychological Dimension of RIR: Distinguishing Pain from True Failure
One of the greatest psychological barriers in modern resistance training is confusing localized metabolic burning with true mechanical failure. When you perform high-repetition sets of Romanian deadlifts, hack squats, or dumbbell walking lunges, intramuscular accumulation of hydrogen ions and inorganic phosphate creates severe burning sensations that signal the brain to stop the exercise prematurely.
Trainees frequently terminate the set at this point, falsely believing they have reached 0 or 1 RIR. In reality, the neuromuscular contractile machinery of the quadriceps or glutes possesses several more repetitions before involuntary concentric failure occurs. Developing true mastery of RIR requires learning to separate the emotional desire to escape discomfort from the physical deceleration of the barbell. When the bar is still moving rapidly, you are not close to failure regardless of how intense the burning feels.
5c. Velocity Deceleration Signatures Across Different Muscle Groups
Biomechanical studies using linear transducers and smartwatch IMU sensors reveal that different muscle architectures exhibit distinct velocity deceleration signatures near failure. Pennate muscles with high fast-twitch fiber ratios (such as the pectoralis major and triceps brachii) experience rapid velocity drop-offs: a set of bench presses may feel smooth at rep 6 and fail completely on rep 8.
In contrast, fusiform muscles or muscle groups with high slow-twitch distributions (such as the quadriceps, calves, and back extensors) can tolerate prolonged grinds, continuing to execute slow repetitions for several seconds before concentric failure. By utilizing high-frequency smartwatch accelerometer telemetry on Apple Watch or Wear OS, modern lifters receive objective kinematic data tailored to each movement pattern, eliminating subjective guessing and preventing both undertraining and overtraining.
5d. RIR Progression Across a 6-Week Mesocycle: From Accumulation to Overreaching
RIR should not remain static week after week; it should follow a planned trajectory across your training block to manage fatigue and stimulate progressive overload:
- Week 1 (Introduction & Calibration): Train all compound lifts at 3 RIR. This introduces the volume while allowing joints and connective tissues to adapt without excessive soreness.
- Week 2 & 3 (Volume Accumulation): Advance intensity to 2 RIR. Increase loads slightly or add a working set to drive progressive tension.
- Week 4 (Intensification): Push working sets to 1 RIR on compound movements and 0 to 1 RIR on isolation exercises. Muscle protein synthesis signaling is maximized.
- Week 5 (Functional Overreaching): Take select final sets to 0 RIR (technical failure). This week stimulates maximal motor unit recruitment right before a planned deload.
- Week 6 (Deload & Supercompensation): Drop volume by 50% and train at 4 RIR. The central nervous system restores neurotransmitter sensitivity, allowing supercompensation to take place.
6. Common RIR Pitfalls and How to Overcome Them
Pitfall 1: Sandbagging Due to Discomfort
Muscular burning caused by hydrogen ion accumulation can be intense at 8 to 10 repetitions, tempting trainees to stop the set and claim “2 RIR” when they are actually at 5 RIR. Periodically calibrate your true RIR by taking a safe machine exercise (like a chest press or leg extension) to absolute failure to experience what true 0 RIR feels like.
Pitfall 2: Confusing Technical Failure with Concentric Failure
RIR must always be calculated relative to technical failure – the point at which form deteriorates – not absolute mechanical failure. If you complete a rep by hitching your hips, rounding your spine, or using momentum, that repetition does not count; the set was already terminated.
Pitfall 3: Ignoring Long-Term Fatigue Accumulation
Consistently training at 0 to 1 RIR week after week without planned deloads will inevitably overwhelm your autonomic nervous system. Pair your lifting with structured deloads and monitor systemic fatigue via your recovery tracker.
7. Frequently Asked Questions
How do I know my RIR estimate is accurate?
Accuracy improves with experience. Track your estimated RIR after every set in your workout tracker. Over time, compare your subjective estimates with objective smartwatch velocity telemetry to refine your internal calibration.
Can I build muscle training at 3 RIR?
Yes. Rigorous scientific literature confirms that sets performed between 1 and 3 RIR stimulate robust muscle hypertrophy provided progressive overload is maintained and total weekly volume is sufficient.
How does nutrition impact my ability to train close to failure?
Muscular stamina near failure relies heavily on intramuscular glycogen. Ensuring adequate daily carbohydrate intake on your macro tracker prevents premature muscular exhaustion and allows you to push deep into the hypertrophic zone.
Should beginners use RIR?
Beginners should first master technical movement standards using structured linear progression before relying purely on RIR. However, introducing the concept early helps novices learn to self-assess effort without forming dangerous habits of lifting to sloppy failure.
8. Summary and RIR Implementation Checklist
Reps in Reserve is the bridge that connects high training intensity with sustainable athletic longevity. By staying within the productive 1 to 3 RIR pocket, you stimulate maximal muscle growth while preserving your joints, nervous system, and recovery capacity.
- Anchor your working sets to the productive 1 to 3 RIR sweet spot.
- Keep axially loaded compound lifts at 2 to 3 RIR to protect spinal integrity.
- Push stable machines and isolations closer to 0 to 1 RIR for maximal localized tension.
- Calibrate your subjective RIR ratings using objective smartwatch velocity telemetry on Apple Watch or Wear OS.
- Log all sets, loads, and RIR in your workout tracker and align daily intensity with your sleep readiness score.